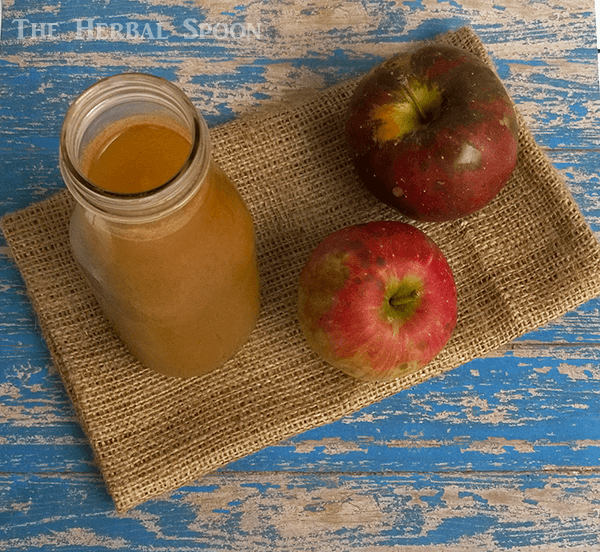
I’ve been a big fan of apple cider ever since I discovered spiced apple cider. And when my source for organic, raw apple cider at the local farmer’s market announced there wouldn’t be any next year, I panicked a little. So I decided to learn how to make homemade canned apple cider on my own.
I just defrosted my last container of farmer’s market cider this week. I don’t have to hoard my apple cider anymore though now that I can make it. Canning apple cider is easy to do at home and you can make a large amount or a small batch.
What Is Apple Cider?
It may seem like a simple question, but what’s the difference between apple cider and apple juice? Apple juice has the fruit solids filtered out so it’s clear, while the apple cider is raw, unfiltered apple juice. While cider is delicious fresh, it doesn’t last a long time.
Homemade Apple Cider With a Juicer
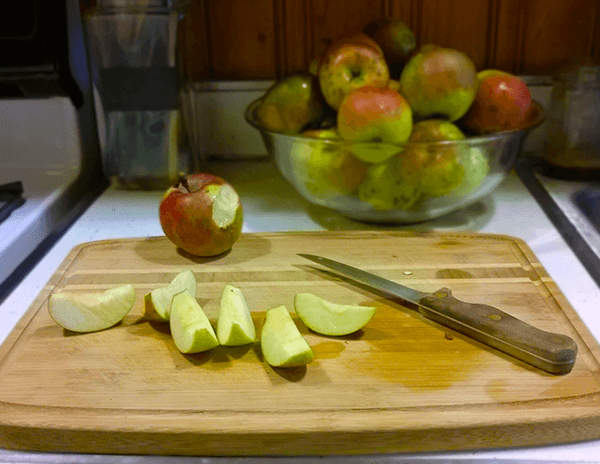
We used to have our own apple trees, but since we moved I use the ones at my parent’s house. Every September we gather totes full of fresh apples to juice, preserve, and dry into apple chips.
Some of our friends used an apple cider press to make cider and I never thought I could do it myself. You don’t need a large apple press to make cider though. Instead, I use a juicer to make our homemade apple cider. A blender may also work (the pulp would need to be strained out some), but I haven’t tried it.
If you’ve never had fresh apple cider, let me just tell you it’s way better than the stuff in plastic jugs from the big box stores!

Can Apple Cider Be Canned?
Canned apple cider is a great way to preserve the fresh taste all year long. It’s technically not cider anymore since it’s no longer raw, but the flavor is just as good and it’s shelf stable. You don’t need a pressure canner since apples have a high enough acidity to use a water bath canner. I have a large canner, but any pot big enough to submerge the jars will work.
How Long Does Canned Apple Cider Last?
Our batches have lasted several years and taste just as fresh as when they were preserved. Like other home-canned apple products, it’s recommended to enjoy them within 2 years. Jars should also be stored at room temperature.
How Do You Make Apple Cider and Preserve It?
If you have an apple press then use a grinder to mash up the apples before putting them in the pressing basket. For those of us who don’t have a press, a juicer will work. This is the one I have. Apple cider will last several years in the freezer or 1-2 years canned.
Canning Apple Cider or Juice
Making homemade apple juice is the same as cider, but the fruit sediment is filtered out. This makes a clear juice, though it probably won’t be as clear as what’s in the store. That’s ok though because it’s healthier and more flavorful. Leaving the pulp in (i.e. apple cider) is even more delicious.
How to Make Canned Apple Cider

Ingredients
- Apples
- Juicer
- Paring Knife
- Apple corer or slicer
Instructions
- Wash, core, and slice the apples. Don't worry about peeling them, but do remove any bad spots. I did all of this with a knife, but you can use an apple corer or slicer if you have one.
- Run the apples through the juicer.
- Optional: Use a strainer or sieve to remove the largest pulp pieces. You don't want to get rid of all of the pulp or you'll have apple juice.
- Enjoy fresh, or can your apple cider with the directions below.
Notes
Store the apple cider in the fridge for several weeks.
How to Make Homemade Canned Apple Cider
Ingredients and Supplies
- Apples
- Juicer
- Sharp paring knife
- Apple corer/slicer (optional but super helpful)
- Large pot
- Canner or large stockpot
- Small saucepan
- Canning jars (pints, quarts, or half-gallon jars)
- Canning lids and bands (I prefer regular mouth size)
- Jar grabber
- Filtered water
- Clean towels
- Jar funnel
- Measuring cup
- Clean, wet dishcloth
Canned Apple Cider Directions
- Place your fresh apple cider into a large pot. Heat until boiling, then reduce to a simmer.
- Fill a canner or large stockpot halfway with water and begin to bring it to a boil. I just use regular tap water.
- While the cider is heating, wash and sterilize your canning jars. You can run the jars through the dishwasher to sanitize. You can also wash them in hot soapy water, rinse well and place them in the oven set at 250 (which is what I do).
- Wash the lids and place them in a small pan with filtered water. Heat to a simmer and then turn down to the lowest heat.
- Remove the sterilized jars from the oven (if you used the oven) and onto a countertop lined with a clean towel. I do this right next to the stovetop.
- Put the funnel into a jar and use the measuring cup to pour some piping hot apple cider into the jar. A funnel is optional, but I’ve found it to be a total necessity when canning. But maybe you’re more coordinated than I am with burning hot liquids.
- Fill the jars, leaving 1/4 inch of headspace. Wipe the rims clean with the washcloth.
- Using the lid grabber tool or a fork, remove a lid from the saucepan and place it on the jar. Screw the band on tightly, but not super tight. Work quickly here, you don’t want to lose the heat in the lids!
- Once the jars are filled, use the jar grabber to gently lower them into the gently boiling water in the canner. You don’t want a rolling boil that’s going to knock your jars over, so reduce the heat if necessary. Make sure the water is just covering the tops of the jars. Gently boil with the lid on for the recommended time below.
- After the time is up remove the jars from the hot water and place them on the towel-lined countertop to cool. Be sure to leave space between the jars and avoid moving them. Let sit until completely cool and sealed. I leave mine overnight.
- Remove the rings and make sure none of the lids flex when pushed in the center. Store any unsealed jars in the fridge or use them immediately. Be sure to label and date the jars! Believe me, once you’ve added a few different canning recipes to your pantry you won’t remember what’s in that jar a year from now.
Canned Apple Cider Processing Times:
- Pints– 10 minutes
- Quarts– 10 minutes
- Half gallons – 15 minutes